
Photos for Law Firm Websites: A Best Practices Guide

By Peter Boyd on October 14, 2021 in Branding Ultimate Guides & Best Practices

In this guide on best practices for law firm website photos, we cover the essentials of what you need to build a stunning and engaging website that sets your firm apart from the rest. Below are top tips on everything from what photos to use (and not to use!), how to get the best custom photography, and how to find the right iStock photos.
1. What Photos to Use for your Law Firm Site
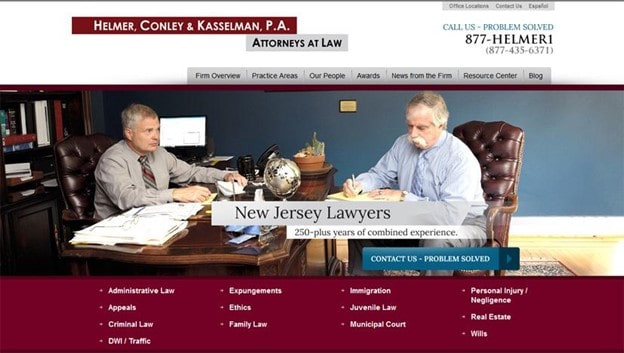
Law firm photos are generally poor in quality and imagination. The gavel has been beaten to death. I have seen enough courthouse steps to build a courthouse.
Web sites need creativity. More importantly, they need to tie the photos/illustrations into the firm’s message. To help those in need, here is what we try to avoid during our web site design process.
Photos to Avoid at All Costs
- Gavels
- Courthouse Steps
- Handshakes
- Wheelchairs on Injury Sites or Death scenes
Photos that Should be Avoided – Unless for a Specific Purpose
- Flags (except perhaps on an immigration page to inform you help people in that country)
- Cityscapes (except on the actual contact page of the city)
- Pens, computers, mobile phones or other devices.
- Crime scene photos on criminal sites (I have seen a few sites that are done elegantly, but that is the exception)
What Photos To Use?
It’s simple. The image that you place on the page must enhance the message you are trying to convey. Otherwise, don’t have the image just for the sake of having an image.
- Find your message first: What are you trying to say?” Your message should always be the main focus of that page. Once your message is established, find a photo to support or enhance it.
- Repurpose: Don’t be afraid to reuse that same imagery on multiple pages to reinforce your message. Your site does not need a different photo on each page, just to be different. This will save time, money and further support your message. It will make for an overall better website.
- Custom photography: We strongly recommend getting professional photos taken of your firm and office. Custom photos give your web site viewers a personal look at who you are and what you’re all about, creating familiarity and comfort; a valuable advantage among a sea of stock photo websites. (For more on this, see
- Use alternatives: Consider using better typography, instead of photography. Consider using illustrations too, as they are usually unique to your firm.
3 Myths about Photos
- Every page needs its own photo, or my site will be empty. Don’t go for quantity over quality, as then, quality always suffers. Many successful sites have no or little photography. For example:
- com – no photos, just links. LOS LINKS!! – as Bing would say.
- com – photos of the products only – not generic book photos.
- com – photos of the actual stories only – not newspaper photos.
- com – photos of the houses only – not random fake photos.
- Photos impress clients. Not true; answering the questions and providing information to your visitors impresses them. The photos need to support your information. A gavel, skyscraper, courthouse, or handshake does not impress your web site visitors and sometimes it can detract.
- It’s easy to find photos and they are cheap! With stock libraries, it is easy to find lots of photos. However, finding the perfect message that goes along with the photo takes a lot of time, energy and creativity. Photos can range from $5 to $150 per photo, which means you need to budget $250 to $7,500 for a 50 photo site. Factor in your designers time to find the photos, your time to review/approve and you end up with a time-consuming and expensive task actually. Let your designers be creative on a handful of photos and you will end up with a better site and less expensive.
One Lesson on Law Firm Website Photos to Take Away
Quality suffers when quantity increases. This is especially true when you are dealing with the creative arts. Let your creative team focus on your message and tie that into a few key photos, whether they are custom or stock photos . You don’t need a different photo on every page of the site – you just don’t.
2. Custom Photography: How to Get the Best Photos for Your Law Firm Website
When custom photography is used right on a website, it can make a momentous difference in user perception, emotional connection, and overall impressiveness. Imagine the clouds part, there’s a majestic light beam shining right on the computer screen, and lady justice is singing ever so sweetly in the background. Really, custom photography has the power to do that!
When it comes to obtaining and getting it, the keyword is “right,” and believe it or not, there actually is a lot involved in making that happen. It’s a downright shame to have spent the time and budget on a professional photographer, only to wind up with subpar results on the website. I’ve seen it repeatedly here with PaperStreet clients, and each time it tugs at my creative heartstrings because there was so much potential missed.
After observing one too many of these unfortunate photography blunders, here are some tips (using examples from our portfolio) to ensure you get the best custom photos for your law firm website.
Find Your Inspiration
Whether it be from your own research or a recommendation from your web designer, it is imperative to first find the style you are looking to achieve. There are so many directions you can take the photography in, from candid action shots in the office to a thoroughly planned and posed photo shoot with your team.
Perhaps you want the user to feel energized or to get a realistic glimpse into your firm by having the pictures vibrant in color. However, if you’re going for a more serious or experienced tone, black and white photos are a perfect fit.
Style Examples


Hire the Right Photographer
Often clients start the custom photography process by hiring a photographer. It could be due to budget, but most likely “somebody knew someone…” and, poof, the decision has been made before anything else.
Now, there is nothing wrong with having a tight budget or getting a referral, but you may find that choosing your photographer before choosing your style inspiration could be like fitting a square peg into a round hole. Photographers have different styles and strengths and some are versatile. You have a sure bet if you approach a photographer with your chosen style and inquire if they can produce the same look and caliber. If the answer is yes, ask to see similar examples from their portfolio. Share these with your web designer to make sure everyone is on the same page for vision.
The Hiring Breakdown:
- Choose the style before hiring a photographer
- Ask the photographer if they can replicate the style
- Request to see similar examples of their work
- Share their examples with your web designer
- Follow the web designer’s format instructions
Whether you put your photographer in touch directly with the web designer to communicate about format (recommended) or you pass the instructions along, they absolutely must be obtained and followed by your photographer.
The instructions should include these basics:
- File size & resolution
- Active area (where the main subject matter is placed) vs. inactive area (the “background” area)
- Website project wireframe or design concept
- Style, color, and editing
Best Practices for Format:
- Send the original files
- No cropping or editing (unless instructed to do so)
- Leave ample space (around the active area in each photograph)
Custom photography is completely worth the time and money spent, not to mention a fun team-building event. It can be incredibly powerful and useful for many law firm purposes in addition to your website such as marketing material, invitations, articles, and presentations. So get ready for the bright lights and follow these tips to get the full value and potential out of your custom photography!
For more on how to prepare your staff for their biography photos, read on to section 3 below.
1. What You Need to Know Before Taking Your Attorney Photos
One type of custom photography that any firm will need for its website is attorney photos. Below is some of our top advice for capturing engaging, quality photos of your firm’s staff.
Prepping for a Great Photograph
One of the most visited pages on a law firm website is the bio page. Potential clients want to know about you before they contact you or your firm directly. Your website bio is one of the first chances you get to make a good first impression, therefore, it is invaluable to have your bio image taken by a professional photographer.
Although images can be enhanced in Photoshop, it is important to think about how you want the photograph to look before having your picture taken. You want your image to convey professionalism and confidence – being well dressed with a smile goes a long way.
You Need a Great Photo for Your Website
Your website is often the first service you provide to potential clients. It gives them a preview of your personality, your attention to detail, and your ability to communicate (which is why it is important to make sure you can deliver on the promises your website makes).
Potential clients want to know a little bit about you before they contact you directly. That means your first chance to make an impression comes before you have a chance to speak or correspond with anyone.
Clients tend to hire attorneys for their knowledge and personality. Therefore, while it’s important to expand on your legal experience, you should also spend some time thinking about your image before your biography photo is taken. It pays off to hire a professional photographer and to update it every few years so that your photo is at least a reasonable approximation of your current appearance.
People want to see who they might be doing business with, especially when it comes to sharing the kind of personal and sensitive information that attorneys require to provide service. Take the time to have a large, updated, professional photo taken for your bio. There is no need to go to great expense, but don’t use a tiny thumbnail that resembles a poorly scanned picture or the typical flat green/ blue background headshot.
Attorneys typically use professional headshots in their email and social media. Headshots are great and they certainly have a place in your marketing collateral but when it comes to an attorney bio page for your website, replacing professional headshots with a variety of candid and wide background full body shots goes a long way.
Things to Consider Before Your Shoot
Real background photos and candid photos tend to be significantly more engaging and more relatable than the typical flat background headshot. These kinds of photographs typically portray you in the best light, and they portray a more approachable feel and trust worthy look, you also tend to look more reliable and they have a personal touch. In some cases they can represent strength and character.
Here are some useful tips to take into account while taking wide-real life background images and candid images.
Take High-Angle Photos
Ask whoever is taking the photographs to take a couple of shots from a higher elevation than your head, by either standing on stool or holding the camera higher than your head-level. This will eliminate any double-chin issues that even the slimmest of us experience in eye-level photos and will give the photograph a custom angle than what we are use to seeing. Avoid taking photos from below eye-level.
Dress For Success
Digital photography tends to make fabric patterns visually vibrate and that can be very disturbing for the eye. Avoid wearing clothes that have dark stripes, small repeated shapes (like dots, flowers, checkered patterns, etc.). Make sure that whatever you wear will look appropriate if cropped at shoulder or waist height, and ensure that you are well dressed and professional.
Bring Light into the Photo
Try to avoid using flash and use ambient lights; if necessary, bring extra lamps and lighting to the location of the photo-shoot. Try to have as much light around you as possible, with a safe distance. This will make you look light and bright without washing you out, and will reduce unattractive shadowing on your face.
Keep It Clean & Simple
Try to avoid cluttered surroundings before staging your photo shoot. If you are taking shots at your desk or office space, put away items like pens, papers and any distracting items. Keep it as clean and simple as possible.
Incorporate Outdoor Backgrounds
Try taking a couple of outdoor shots. Photographs out in nature tend to be more engaging, and images with natural light tend to also be more favorable for a photographer’s eye. It can even be shots outside of your office, building on a nice natural background.
Take Multiple Shots
Finally, make sure you take multiple shots of the same pose from different angles and ask the photographer to keep a wide background for the designer to crop the image as needed. It is very important to keep in mind that it is better to have a wide background image and crop it as you wish to have a tight cropped image and have no background to work with. The same goes for multiple shots — it is best to have variety to choose from that to end up wishing you had taken the time to do a couple of extra shots.
2. Finding and Choosing iStock Photos for Your Website
In most cases, you will not solely be using custom photography on your website. It’s often easier, and cheaper, to use stock photos for more basic purposes like adding law-related imagery to your pages.
Below are some tips for how to obtain the best stock photos for your website, and guidance on how to do so using PaperStreet’s web design services.
Tips for Finding Meaningful Photos
Sometimes it isn’t easy to find the perfect photo. Use these tips to narrow your search and download the right image in half the time.
Limit Scrolling
You can change the “view” at the bottom of the page to 200 images at a time. Allowing more results to populate on the page at once means you have to click less, saving you time.
Search by Color
iStock allows you to search by color. Use the dashboard on the left-hand side to choose a color (or type in an exact HTML color).
Get Specific
Typing in “lawyer” results in more than 15,000 images. You would be there all day trying to find the perfect photograph. Continue to narrow your search by adding keywords to the search bar.
Use the Thesaurus
Afraid your photos will look like every other website? Utilize an online thesaurus to get creative with your searches.
How to Find and Upload Stock Photos Using PaperStreet’s Web Design Services
One of PaperStreet’s perks is that iStock photos are included in our design packages. Let’s say you signed up for an Essentials project with PaperStreet and are now looking for images to use on your new site. All Essentials sites include 5 images from the Essentials library on iStockPhoto.com. If you need more than 5 images, or if you would like to purchase images from the Signature library, please check with us for pricing.
Selecting images is fun, but it can be time consuming. Below, I’ll list the instructions on how to make this process as quick and painless as possible. But before you start, please make sure you have already selected the layout you will use for your new site. Take a look at our layouts.
When you select your layout first, it gives you the advantage of knowing where the images you will be selecting will be placed.
Very important: For example, if you select our Impressive Design layout, you know you will need images for the main home page image area and for the practice area boxes. The same goes for other layouts, such as the Attorney Focus theme. The main difference is that if you will be featuring an attorney photo for the main home page area on this theme, you will need to provide that image to us and will need to make your own arrangements with a preferred photographer.
Selecting the images:
Step 1
Go to the iStock home page.
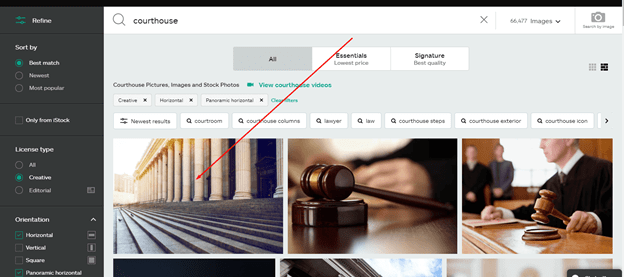
Step 2
View the guide:
1. Type the keyword / subject of the type of image you are looking for
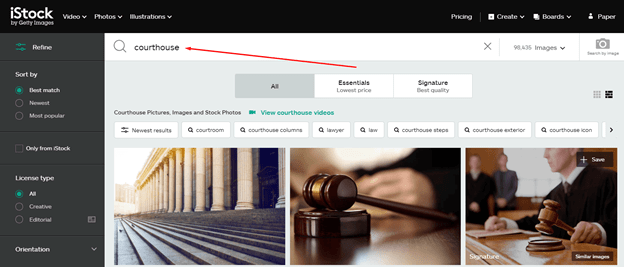
2. On the license type, select “Creative”
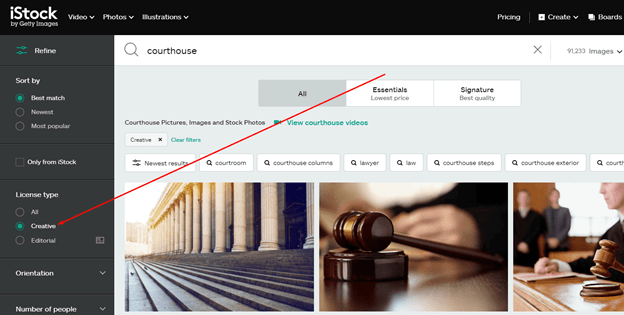
3. For the orientation, select “Horizontal”
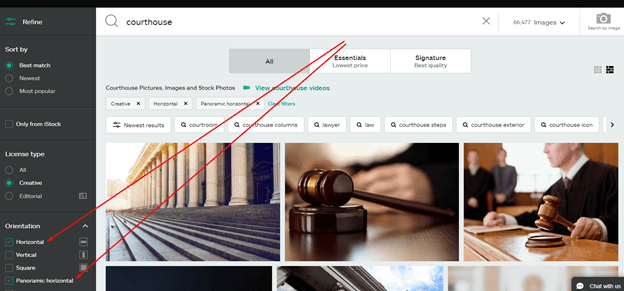
4. Click on the image you like to see more information
Step 3
On the image detail page, you can click to enlarge the image.
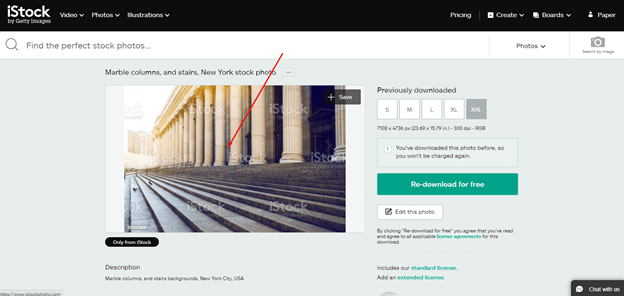
Step 4
If you like the image and would like to use it on your site, copy the image’s address and paste it on a text document or email.

Step 5
Repeat the process for all the images you would like to use on the site.
Once you are done, your list should look somewhat like this:
- Photo 1 – Home page
- Photo 2– Pratice Area 1 (list your practice area name)
- Photo 3 – Practice Area 2 (list your practice area name)
- Photo 4 – Practice Area 3 (list your practice area name)
- Photo 5 – Practice Area 4 (list your practice area name)
Step 6
The best way to share your favorite images with us is by the stock photo ID.
The stock photo ID is populated when you click on any iStock image.
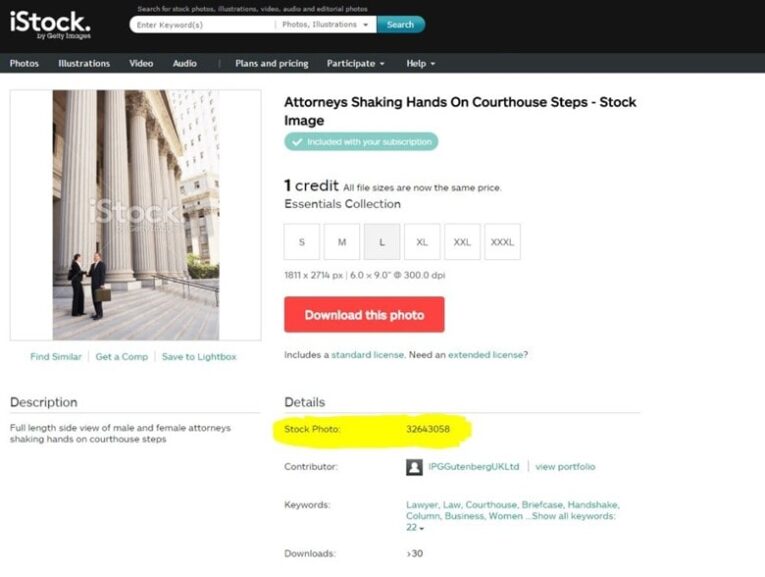
We can pull up any image as long as we have the stock photo ID. Simply copy and paste a list of your image IDs via email or on your project brief. We will then browse the images and proceed with your project.
Seek expert support in finding, taking, and using the best photos for your website
To learn more about the best ways to make sure your law firm’s website is competitive and engaging, contact us today or take a look at our web design services. And if you have more tips to add, leave a comment below!


